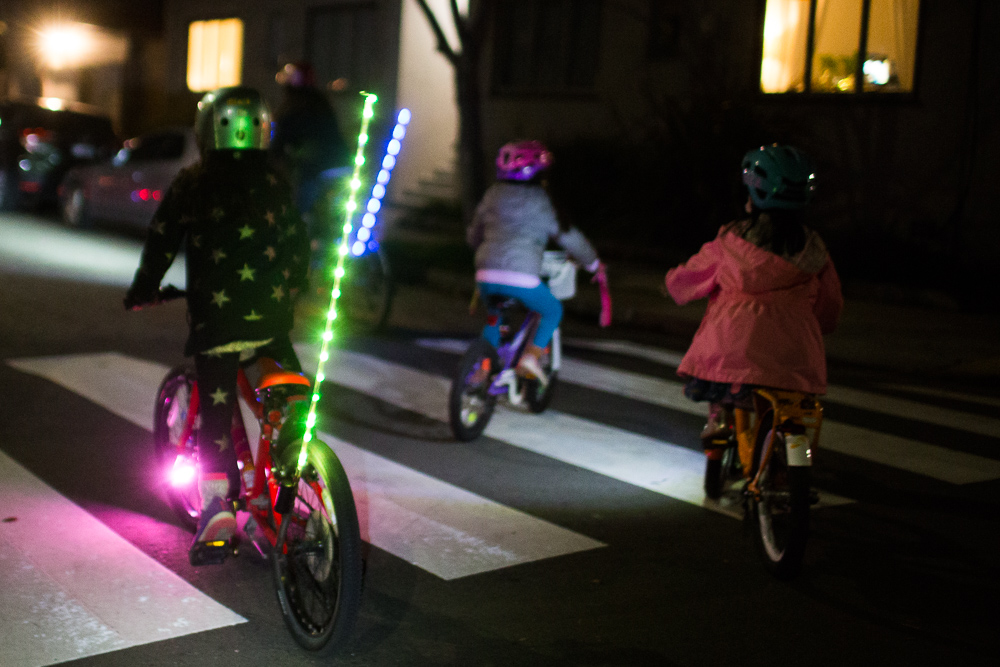
I'm trying to make riding bikes as a family easier for everyone. One project that I'm working on is building a light to help keep riders (especially smaller ones) more visible when it's dark.
Making prototypes of flexible shapes
While working on the prototype bike lights, I needed to make some flexible shapes to connect poles together and to act as a soft bumper to protect one from any pokey parts.
After some research on DIY silicone molding, I found that silicone rubber is a relatively friendly material to work with and was easily to buy. I bought a small trial kit to try making some parts. (I found that it seems way more common for people to use silicone rubber to create the mold cavities themselves, such as in this Makerbot tutorial. Here's an example of someone working on a concept more like mine.)
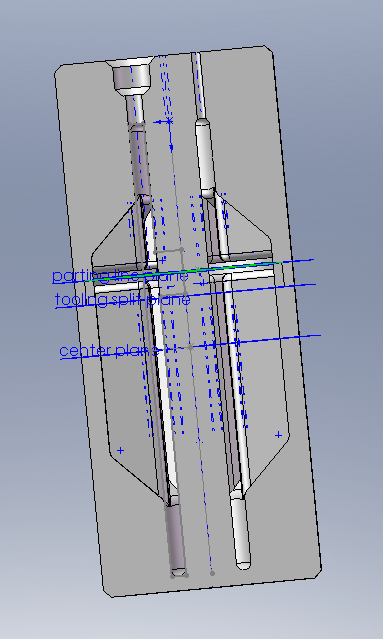
I read up on designing molds with Solidworks. With that CAD software, I started by modeling the shape of the final part that I wanted to make. Then I applied a series of steps to create a two-part cavity for the part. After that, I added holes for the molding material to flow and vents to allow air to escape after the material was injected.
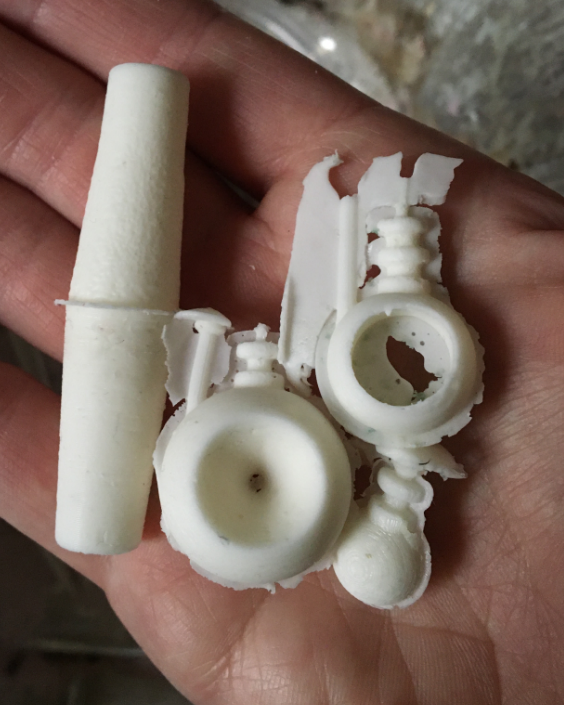
I realized right away that liquid silicone rubber was thicker than I anticipated. I initially tried to pour the liquid into the mold, but ended up with a lot of voids due to air bubbles and poor flow. If you have a vacuum chamber, you might be able to avoid this and pull the bubbles out of the mold. I didn't, and instead bought some disposable plastic syringes to help inject the liquid with more pressure, and tried to carefully place air vents to reduce voids.
Making a mess
Molding silicone was a messy and weird process. I used a two-part silicone that cures at room temperature. One of the challenges is that you don’t know how your part will turn out until you remove it from the mold. I learned that a little heat increases the speed of the cure, so I left them in our oven (while off) overnight. The pilot in our oven keeps is a bit warmer than room temperature.
Demolding and seeing the parts
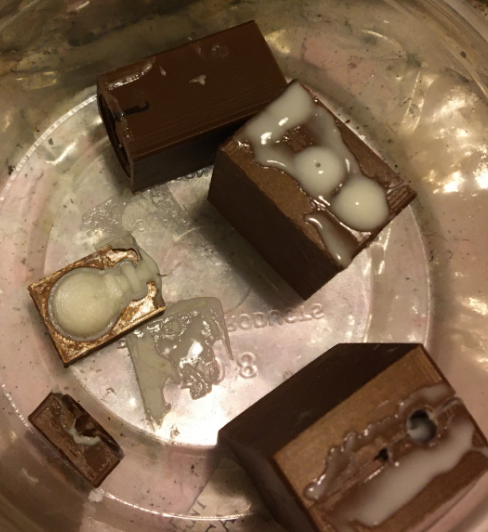
The first parts that came out were way too flexible, and I realized that I needed to add filler. I tried using silica powder, corn starch, or talc. The fillers reduce cost per part (silicone is expensive compared to many rubbers or plastics) and increase stiffness, at the expense of strength and elongation. The only talc that I could easily find was Gold Bond. I only tried it once because I really don’t like how it smells. If you want a mostly unused container of Gold Bond, let me know. David Neat has a really good post with his knowledge and experiments regarding adding fillers to silicone for molding.
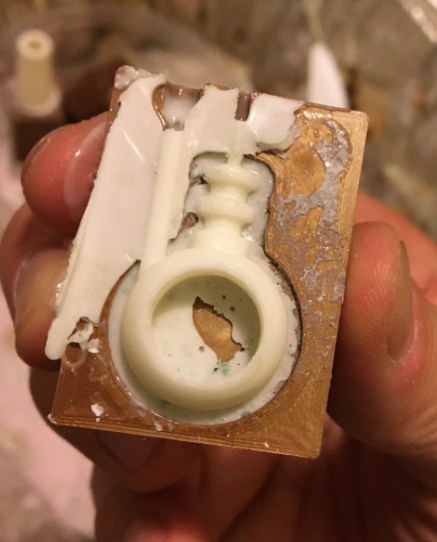
Initially, I tried using dish detergent as a release agent. I was worried about the silicone sticking to the mold cavity. I had read that Vaseline/petroleum jelly would work well also. But then I realized that the silicone came off of the 3D-printed PLA pretty easily, and adding a release seemed unnecessary. Here are some results from the first few parts I made.
The syringes helped a lot.
Overall, this was a helpful learning exercise, and I made some fun shapes. But I found that the strength of the silicone parts was not sufficient and eventually had to switch to a different material.
 but effective bike lights for night riding")


")
 to help kids joyfully bike to school")